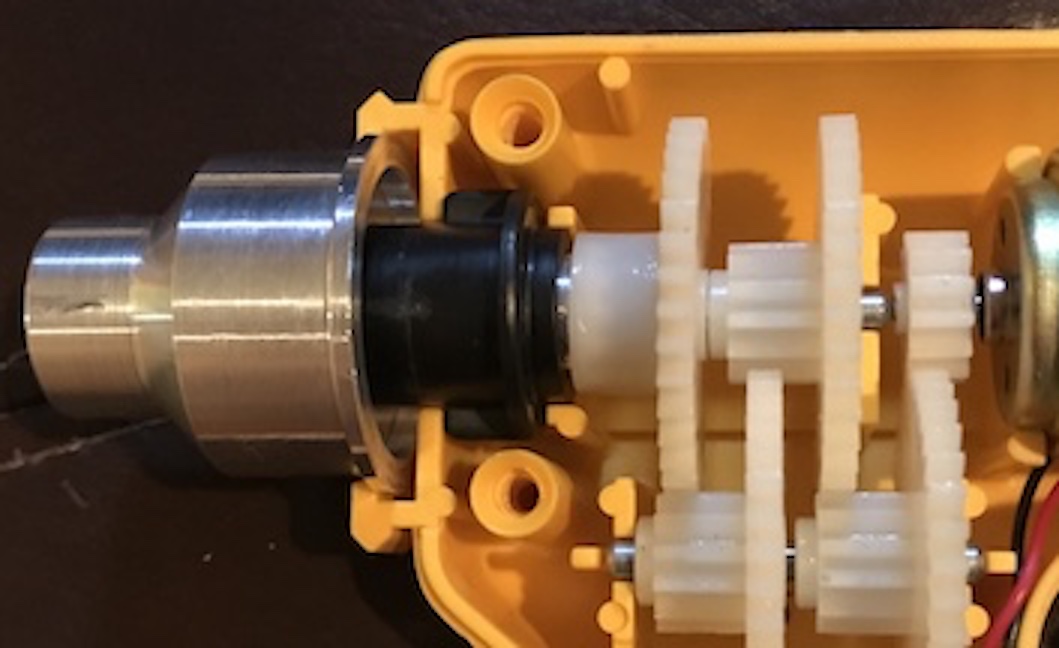
Levi dropped the drill on the ceramic tile floor and broke the end off of the tool bit holder. The drill was taken apart and the broken part was removed. Many measurements were taken of both the broken part and a tool that fits within the broken tool holder. The first part is shown in the SketchUp plans below. A decision was made to replace the part with two pieces as the part requires a round hole that ends with a smaller square hole.
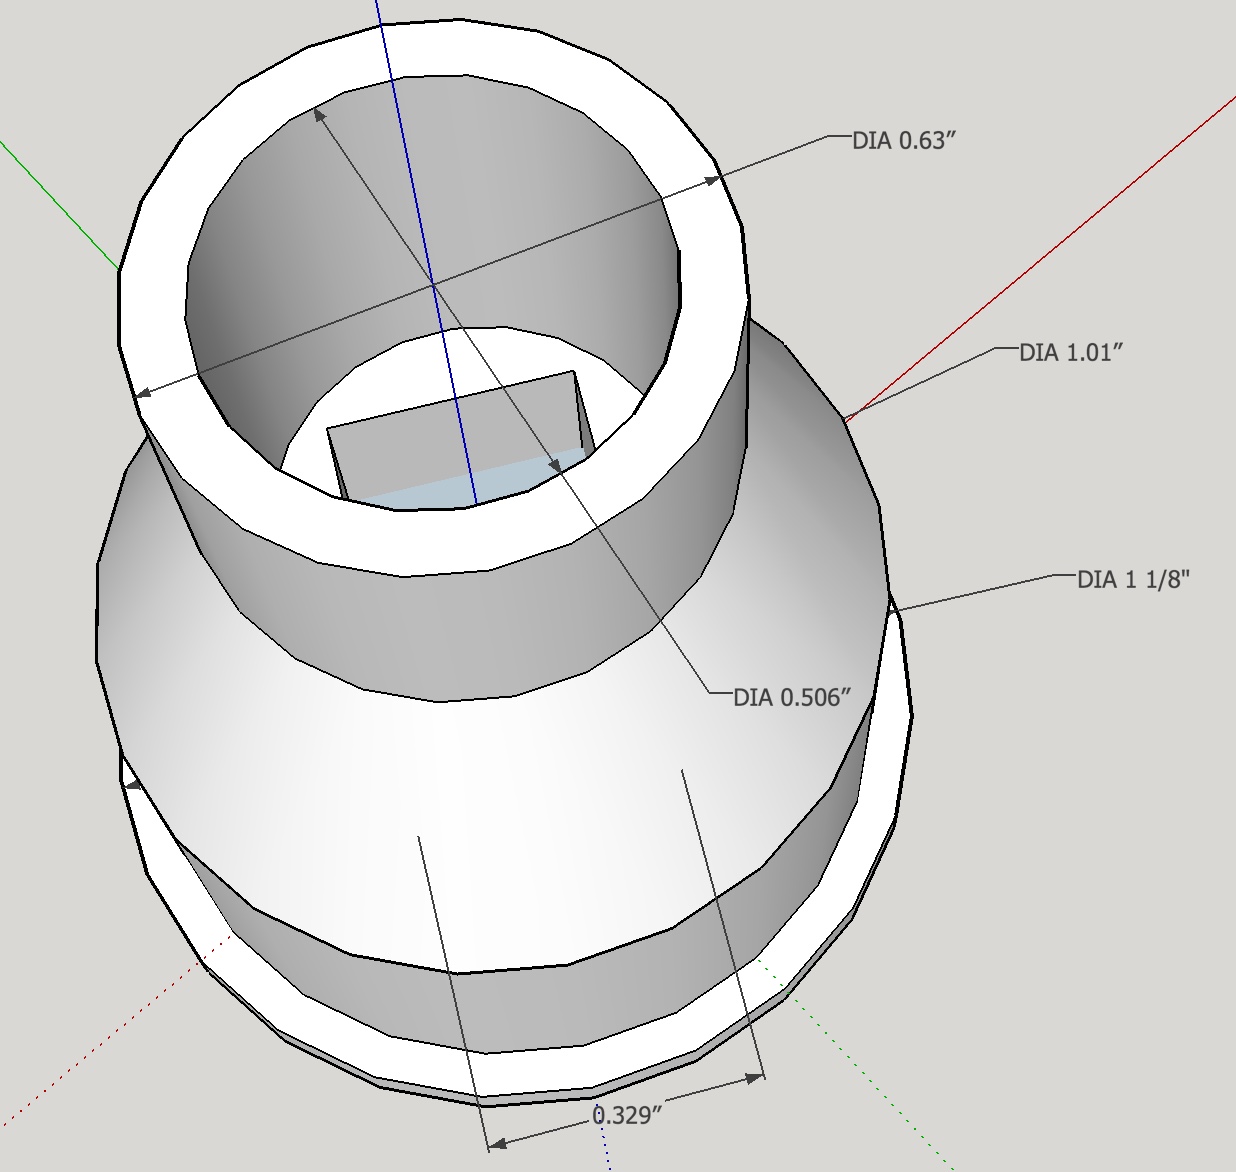
This part was made on the lathe as follows. A 1 1/8" length of 1.25" aluminum round bar was cut off with a hacksaw using a little oil to ease the saw's movement. This was chucked in the 3-jaw chuck and faced. It was reversed in the chuck, faced, and drilled through with a "Q" drill. The hole was enlarged with a "Z" drill to a depth of 0.57". The lathe headstock was rotated 2-3° and the hole was bored to 0.51" to the same depth as above providing the taper for holding the attachments securely. The OD was reduced to 0.63" for a length of 0.356" giving a tube with a 1/16" wall. The head was then rotated the other way 45° and the taper was cut down to the diameter of the tube.
The part was flipped around in the chuck, now holding the part by the tube. The OD was reduced to 1 1/8" and then all but the last 0.08" was reduced to 1.01". The through hole was opened to 0.895" for a depth of 0.14". The 0.329" diameter hole was then opened to a square shape with a three corner file after sketching lines for the square.
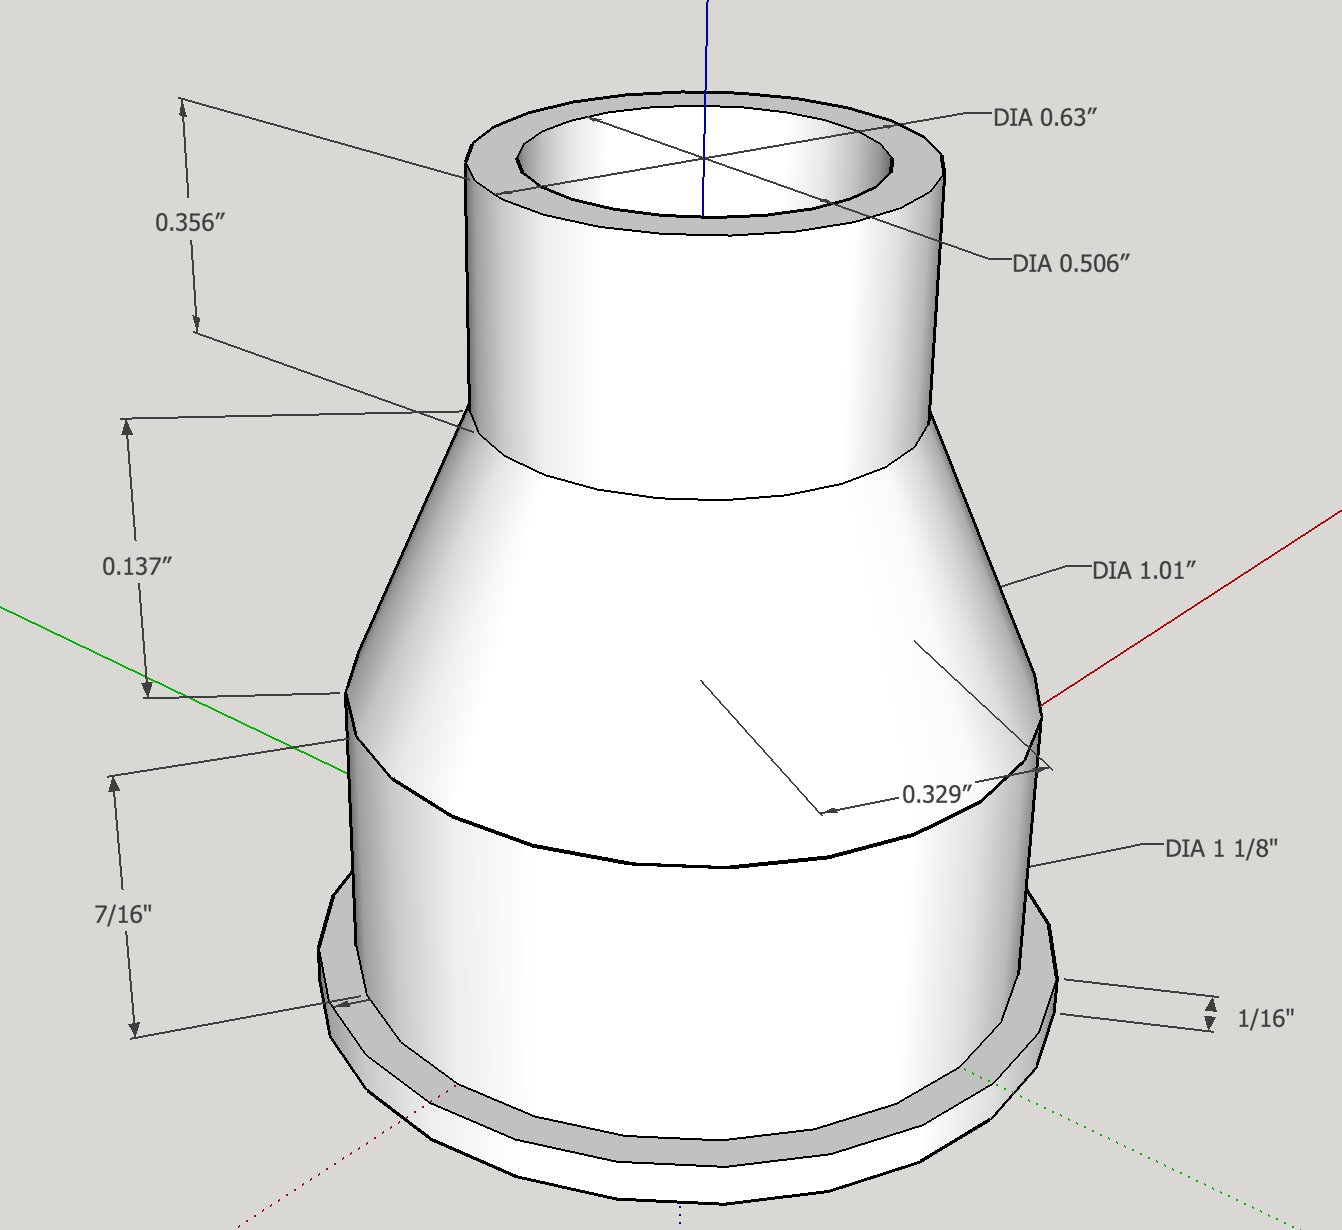
The internal section of the broken part was simpler as seen in the plan below.
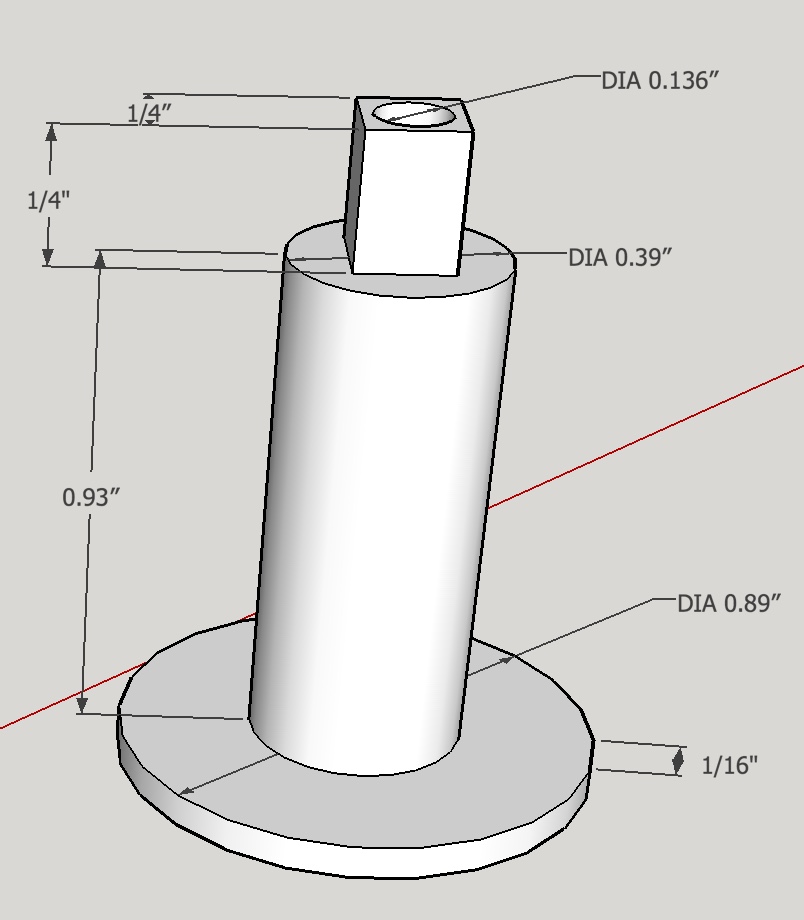
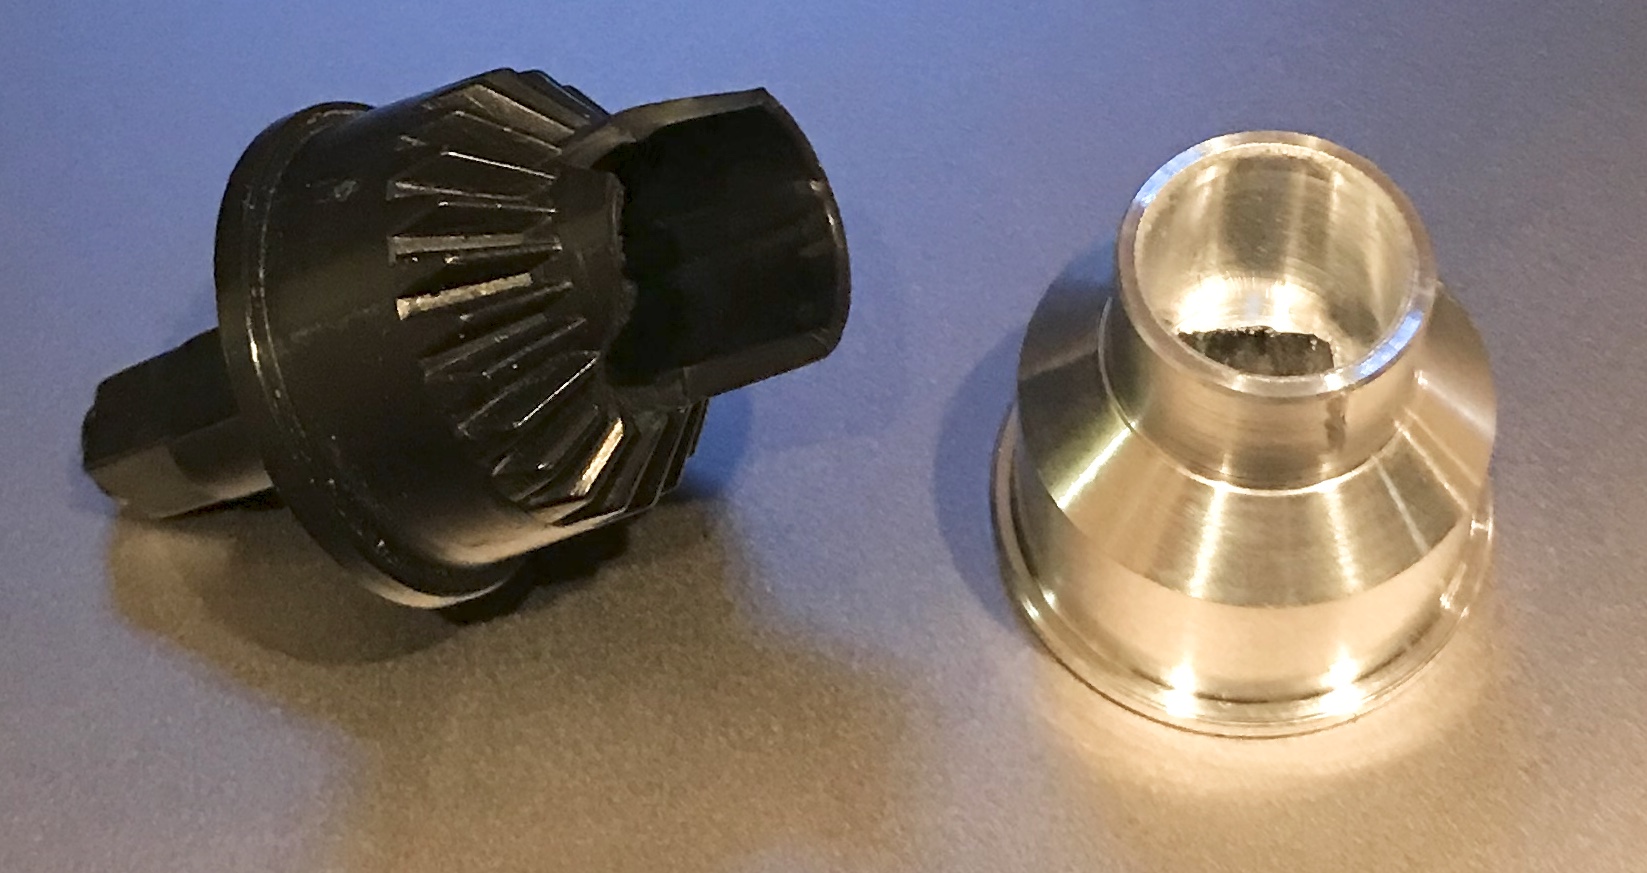
A 1.125" length of the 1.25" round aluminum stock was cut off with a hacksaw. Both ends were faced. One end was reduced to 0.39" (to fit the plastic part that fits over it) for a length of 1 3/16". A 0.136" hole was drilled to about 3/4" depth and fit loosely over the steel shaft. The chuck holding the part was fixed to the mill table and the four sides of the shaft were milled removing about 0.07" per side to make the square end. The part was returned to the lathe, flipped in the chuck and the large end was faced to 1/16" thickness. Fitting the parts before glueing indicated a number of tight tolerances that need to be adjusted with a little drilling and facing. The two finished parts are shown in the following picture.
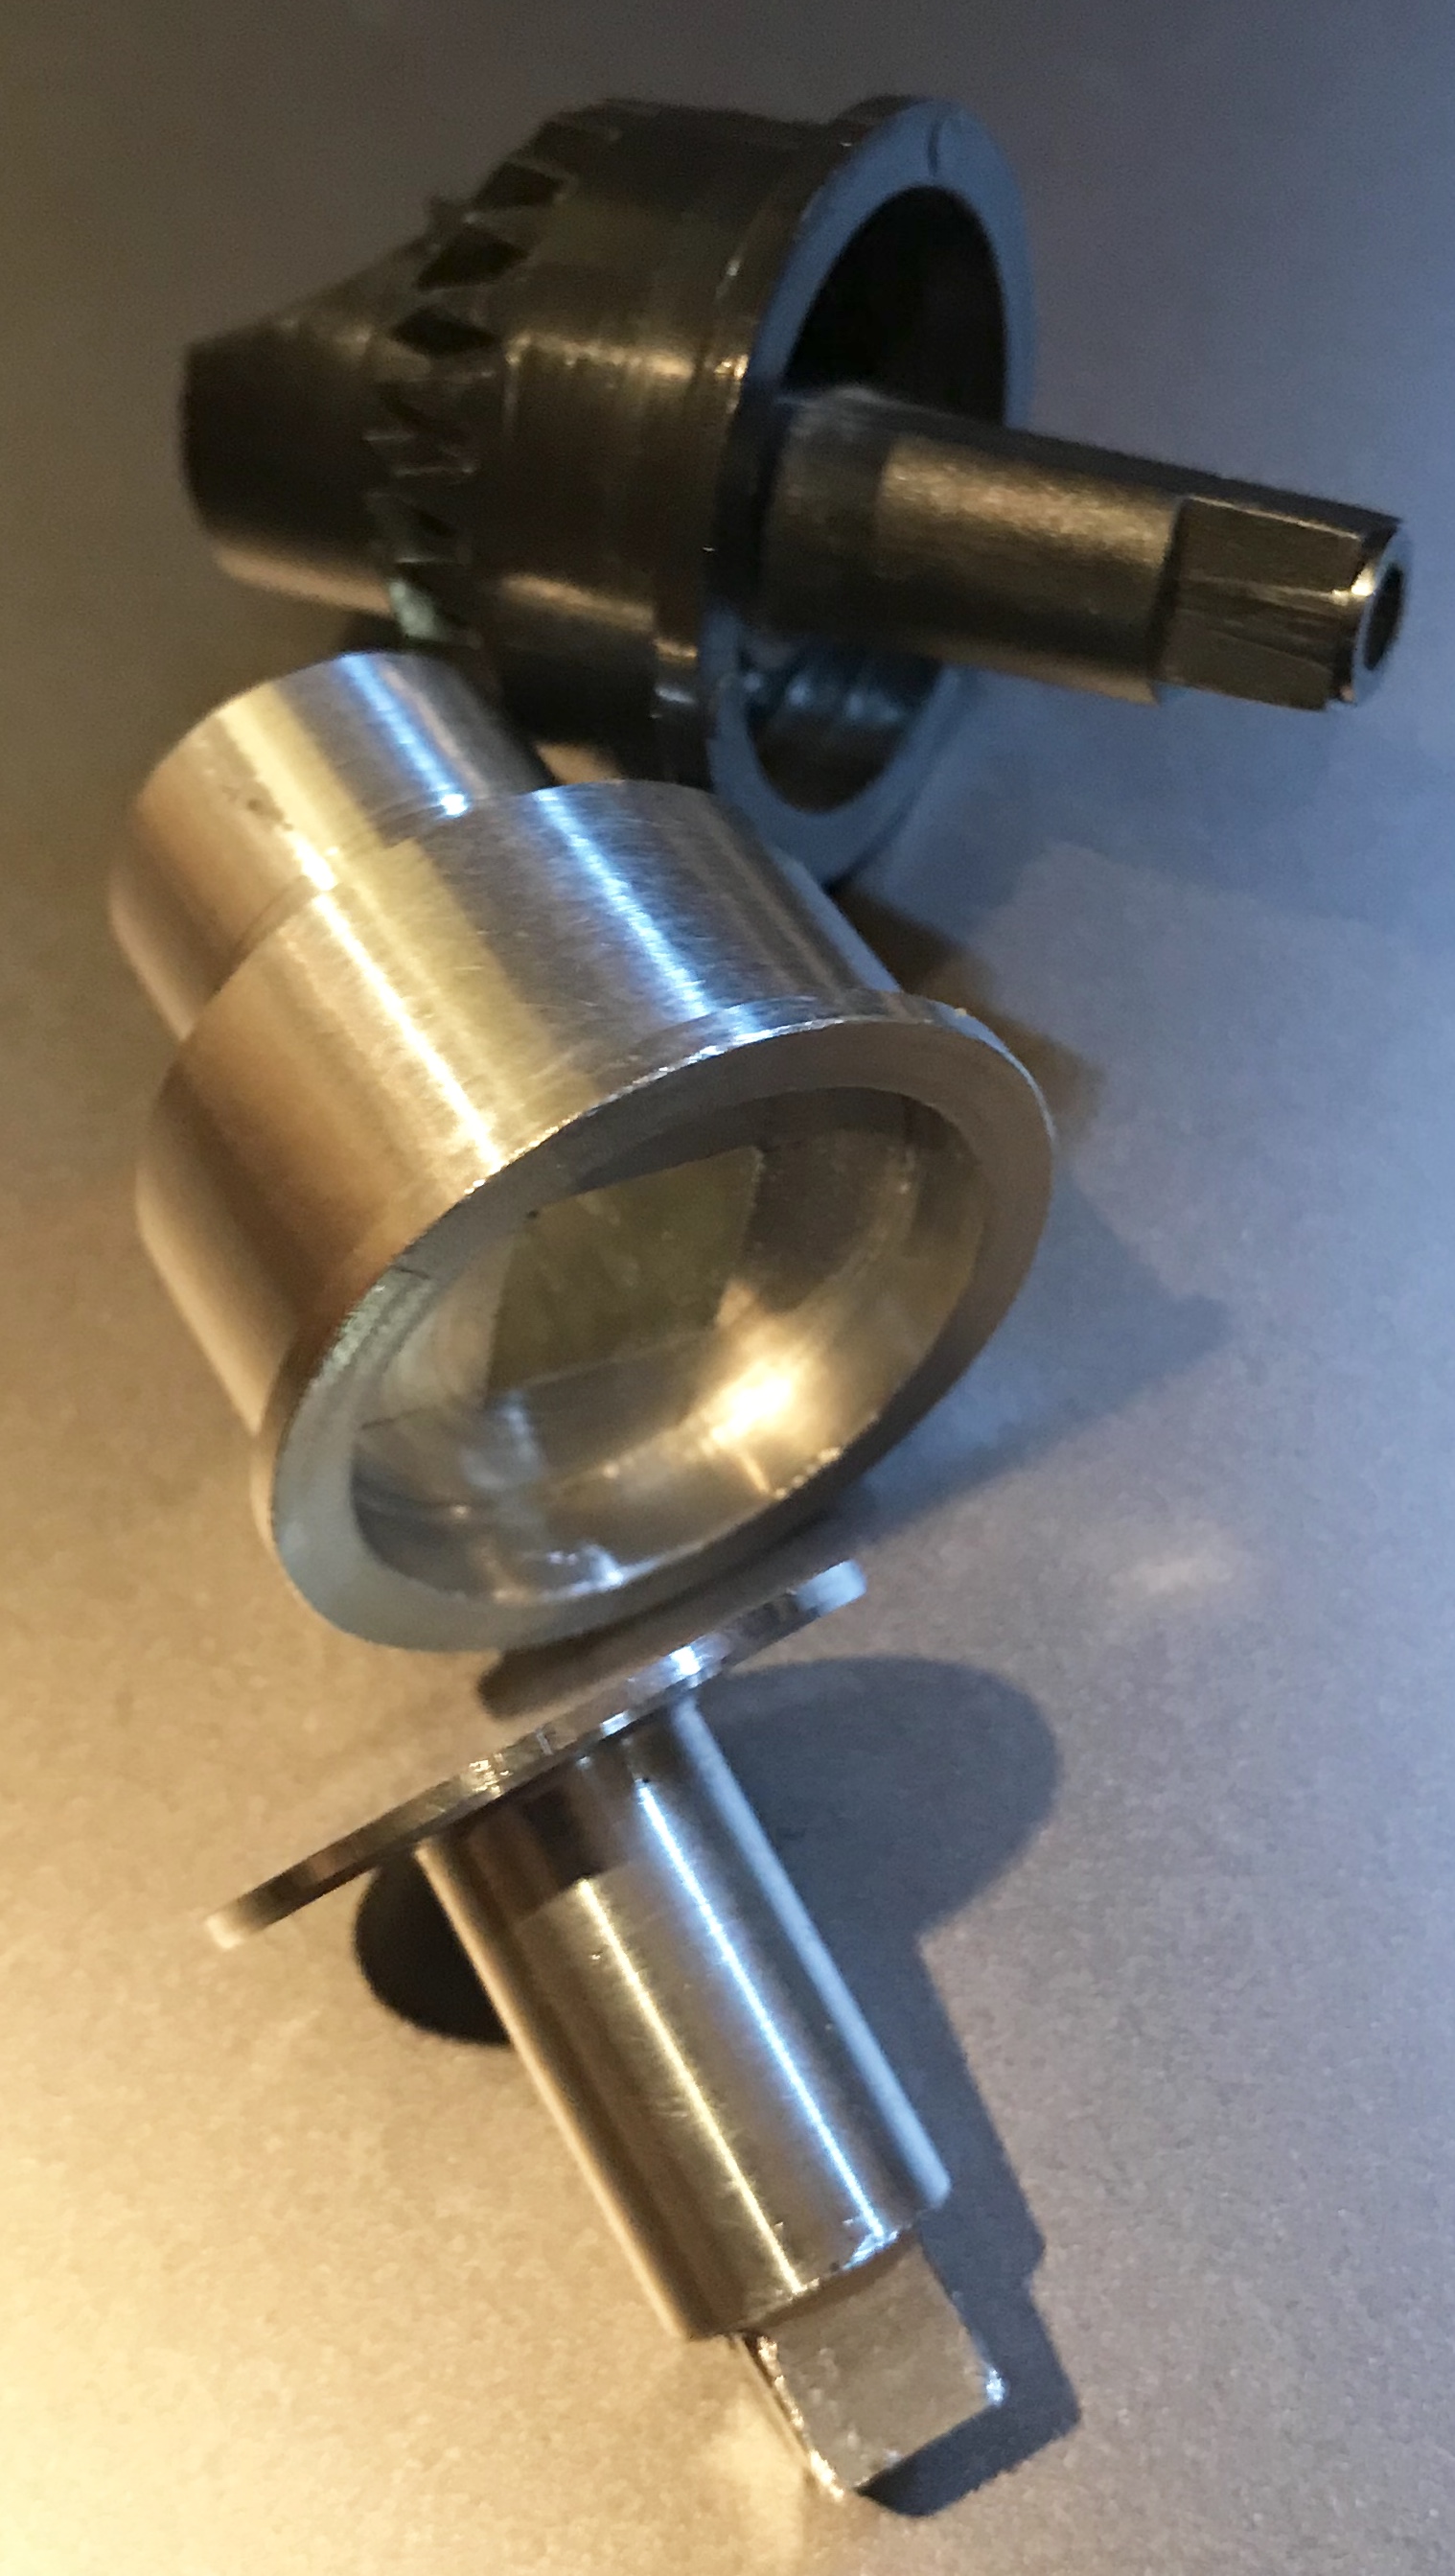
To complete the repair a bead of glue was placed in the external part around the square hole. The internal part was put in place and the whole left to dry for an hour or so. The assembled replacement was then put in place and the toy reassembled. The completed repair is shown below. Attachments are held maybe a little more firmly than with the old adapter and the mechanism spins freely.